Before you can get started with Shift Manager, you will need to create ‘Roles’ and ‘Shift Types’.
Go into the ‘Clients’ area and click on the client you wish to get started with.
Click on the ‘Roles’ tab on their profile and then click on the ‘Add Role’ button on the right. You will then get the following popup.
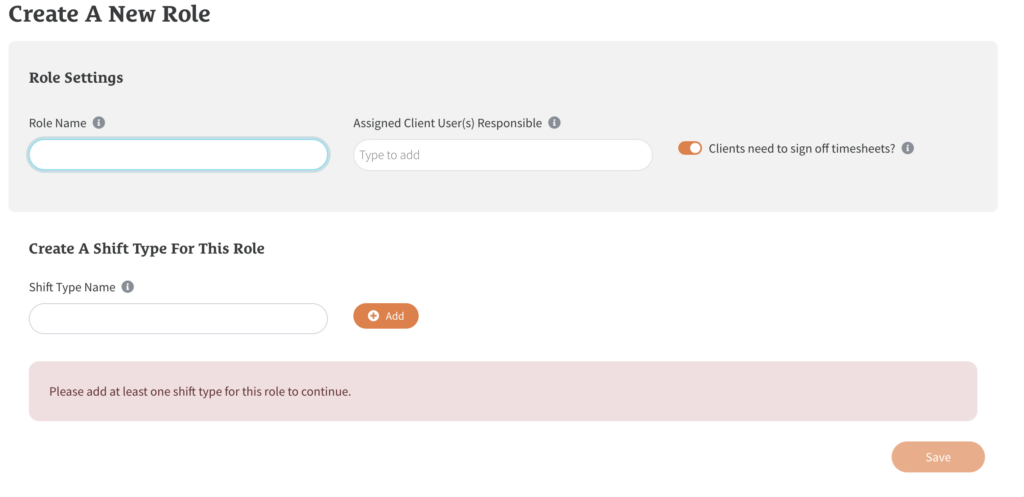
To create a new role, start by adding the ‘Role Name’ on the left hand side. This should be something like ‘Admin Assistant’ or ‘Nurse’.
You can then assign someone listed in the ‘Contacts’ section of that client who will then be responsible for that role. If you then select to allow client sign-off, this person will then be responsible for signing-off any timesheets for that role.
Click into the ‘Assign client user(s) responsible’ input box and start typing the person’s name. If they’re already in the system, their name will come up below the box for you to select, if not, you will need to add them as a ‘Contact’ for that client before you can assign them responsible for any role.
You then need to create ‘Shift Types’ for this role. This should be something like ‘Day Shift’, ‘Night Shift’, ‘Under 18’ or ‘Over 25’ etc.
Type the name of a Shift Type you’d like to add into the ‘Create a new shift type’ input box and then click the ‘Add’ button.

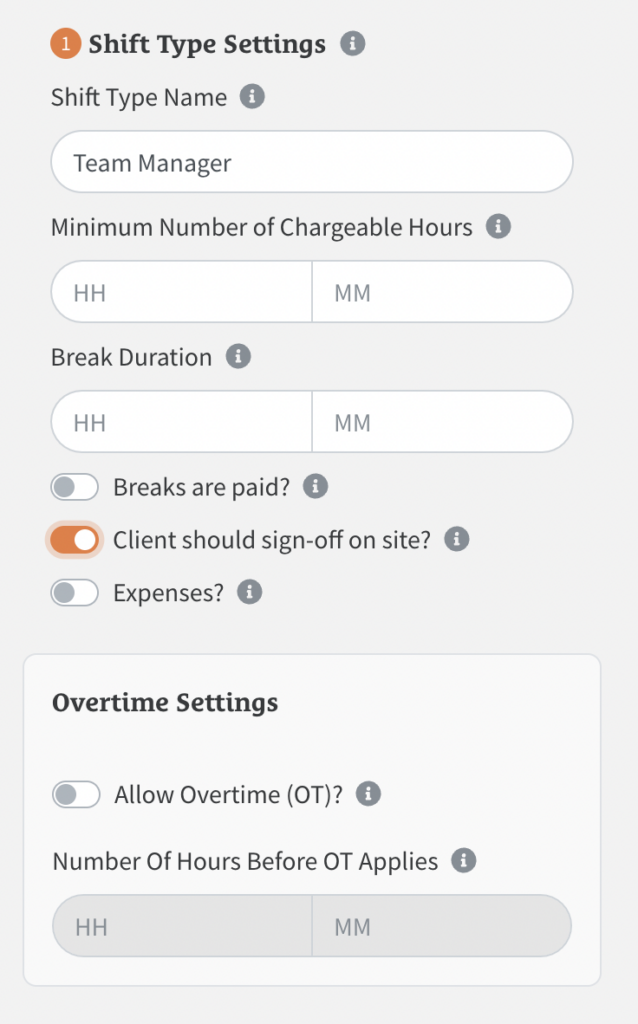
You will then get the popup (above) where you can add the ‘Rates’ for that Shift Type.
Here you can add figures for Hourly Pay, Holiday Pay, Pension Contribution, National Insurance Contribution, Overtime Rates (OT), Charge per Hour, Minimum Shift Duration, Maximum Shift Duration, Break Duration, if the break is paid, if Expenses are allowed and if this Shift Type needs to be signed-off on site.
To add any ‘Overtime Rates’, add ‘Maximum Hours’ to the Shift Type. Any candidate hours then over this figure will then be calculated at the ‘Overtime Rates’ added here.
Click ‘Save’ when done.
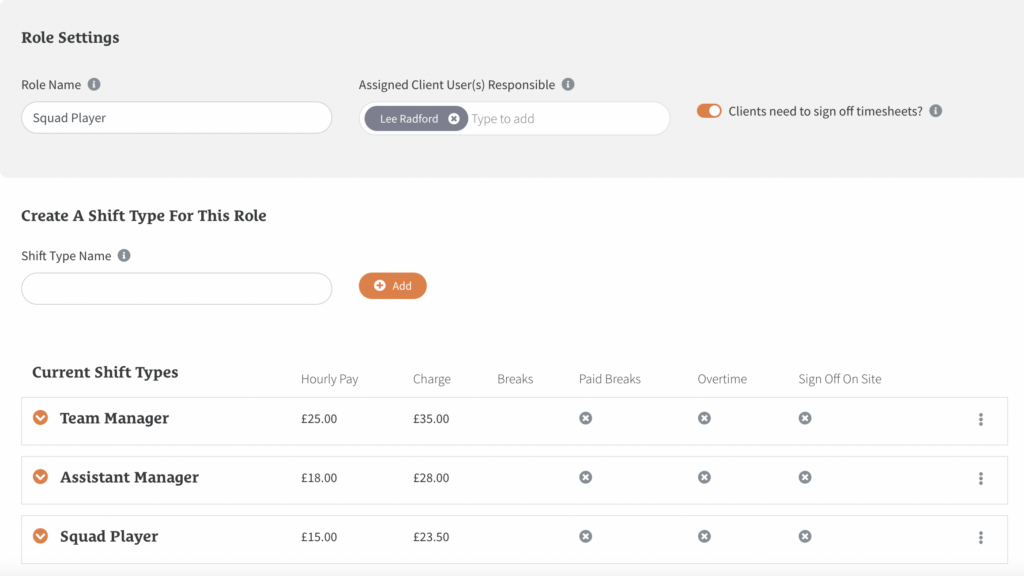
The Shift Type will then appear under ‘Current Shift Types’ and you can edit it at any time by clicking on the 3 dots on the right of Role you want to change. Then the ‘Edit’ button on the right.
Repeat these steps to add any additional Shift Types needed for that Role.
You can then decide if the client should sign-off any Timesheets for this Role, or if the client needs to sign-off any Timesheets on site.
Click ‘Save’ when done.