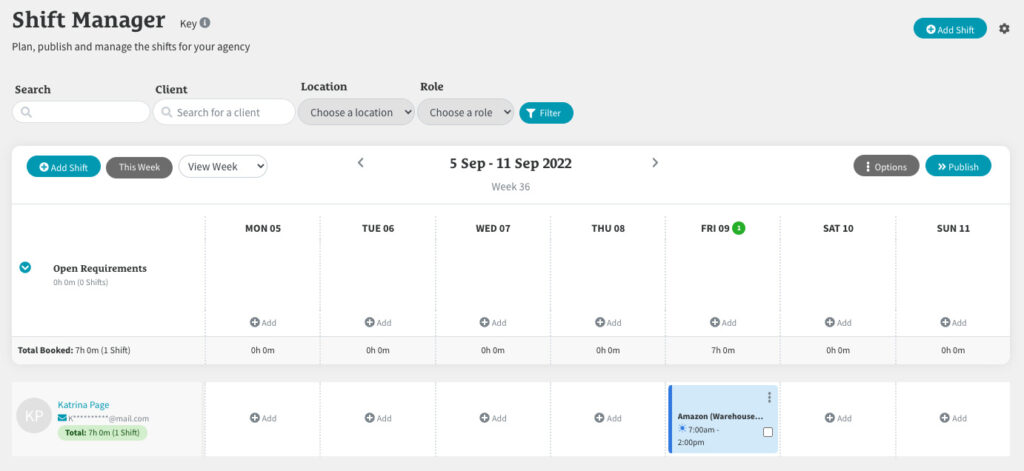
Go to Shift Manager > Calendar
Creating a shift is the same process as creating an Open Requirement.
The difference being that the shift will appear as an ‘Unpublished Shift’ in the Shift Calendar for the assigned Candidates rather than appearing in the Open Requirements panel.
To create an Open Requirement instead, read ‘Recruitment: How To Create An Open Requirement’.
There are three ways to add a shift:
- Click the ‘Add Shift’ button on the top right hand side of the screen
- Click on the ‘Add Shift’ button in the top left corner of the Open Requirements panel
- Click on the ‘Add’ link in the Candidate’s row in the Shift Calendar
If it’s the first time you’re adding a shift, you will be shown straight to the page where you can create a new shift from scratch.
If there are already shifts in the system, you will instead then be asked if you’d like to use an existing shift as a template, or if you’d like to create a new shift from scratch.
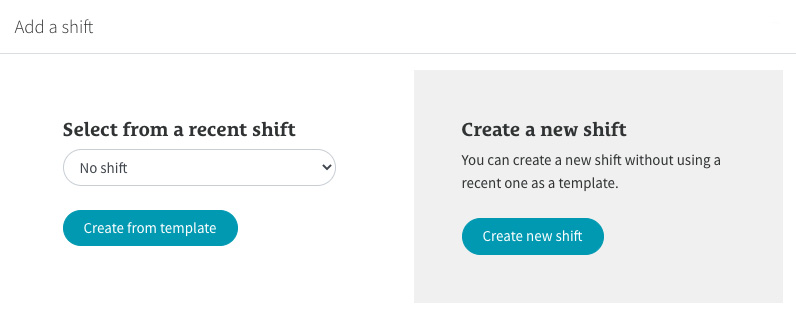
Creating a shift from a template can save time but if you’d like to create one from scratch, click the ‘Create New Shift’ button on the grey panel on the right side of the popup.
How To Add A Shift From Scratch
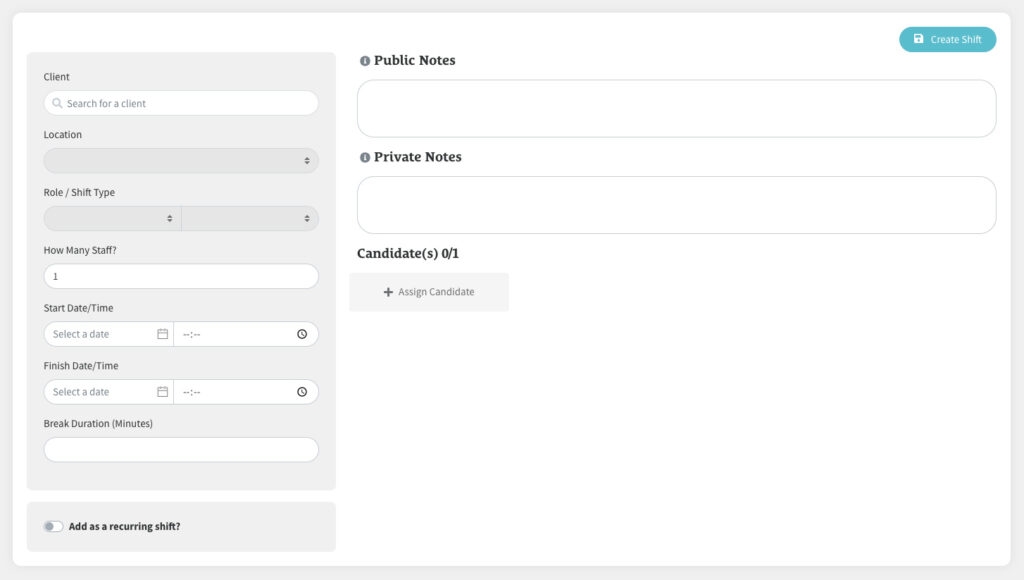
1.Add The Shift Details
Start on the grey panel on the left and type the name of the ‘Client’ into the ‘Client’ input field.
As you type, a dropdown menu will appear showing all the Clients in the system that closely match what you are typing.
Select the ‘Client’ and you’ll notice the ‘Location’ input will turn white. You will now be able to select the ‘Client Location’ from the ‘Location’ dropdown menu.
Next select the ‘Role’ and ‘Shift Type’. If there are no ‘Roles’ or ‘Shift Types’ listed, you will need to create them before you can create a shift. See ‘Recruitment: How To Create A Role & Shift Type For Shift Manager’
Next you’ll need to add ‘How Many Staff ‘(Candidates) you’ll need for shift. If you are just creating one shift for one Candidate, just add ‘1’ into the ‘How Many Staff ‘ input field.
You then need to add the ‘Start Date/Time’ and ‘Finish Date/Time’ and then add if any ‘Breaks’ are included. With this, please make sure “Start Date and Finish Date” are for the same day if you are reoccurring shifts (see below)
2.Decided If The Shift Recurs (Optional)
You then have the option to add the shift as a ‘Recurring Shift’. This will copy the shift and details to your selected days in the Shift Manager calendar.
Toggle the switch on the ‘Add As A Recurring Shift?’ panel if you’d like to use this feature.
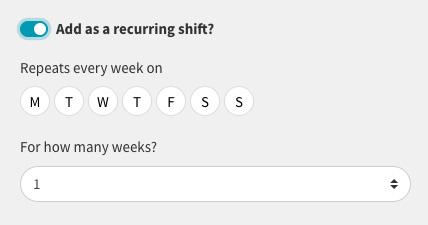
Select which days of the week you’d like the shift to recur and then select from the dropdown for how many weeks.
3.Add Any Notes (Optional)
If you look on the right hand side of the main screen, you will see you also have the option to add ‘Public Notes’ and/or ‘Private Notes’.

Public Notes will be sent with the shift details to the Candidate when the shift is booked. Private Notes are for internal use only and won’t be visible to Clients or Candidates.
4.Assign Your Candidates
Once you’ve added the number of staff required in the ‘How Many Staff’ input field, you’ll notice that this number will appear next to ‘Candidate(s)’ on the right hand side of the main screen, along with this amount of grey ‘Assign Candidate’ blocks.

If you’re unsure which Candidates to assign, you have the option of leaving these block blank and then the shift will then be added instead as an Open Requirement to the Open Requirement’s panel.
To assign Candidates, click on any of the ‘Assign Candidate’ blocks.
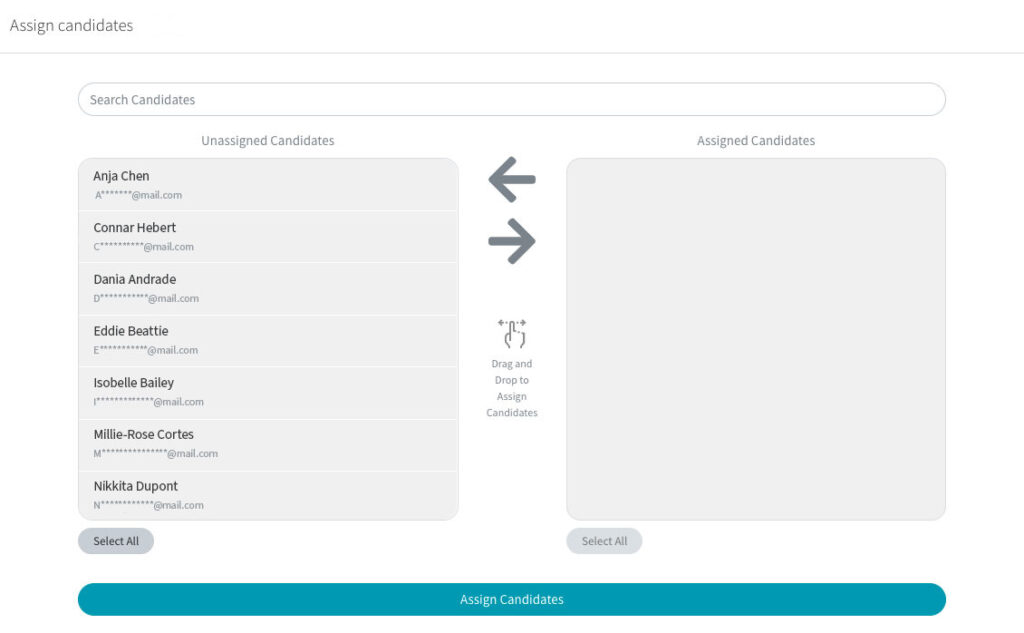
Select or search for the Candidates you require and then drag and drop them over to the ‘Assigned Candidates’ grey panel.
Click the ‘Assign Candidates’ button when finished and the chosen Candidates will now be added to the grey blocks on the main screen.
5.Create Your Shift
Click the ‘Create Shift’ button when done.
If you chose to assign Candidates, the shift will have been added to the assigned Candidates on your chosen days as an ‘Unpublished Shift’.
If you didn’t assign any Candidates, the shift will have be added to the Open Requirements panel.