In Library, click on the ‘Add’ button on the right hand side of the screen.
You’ll then be asked what you’d like to add to your library.

Click on ‘Document’ and then you’ll be asked to upload your document.
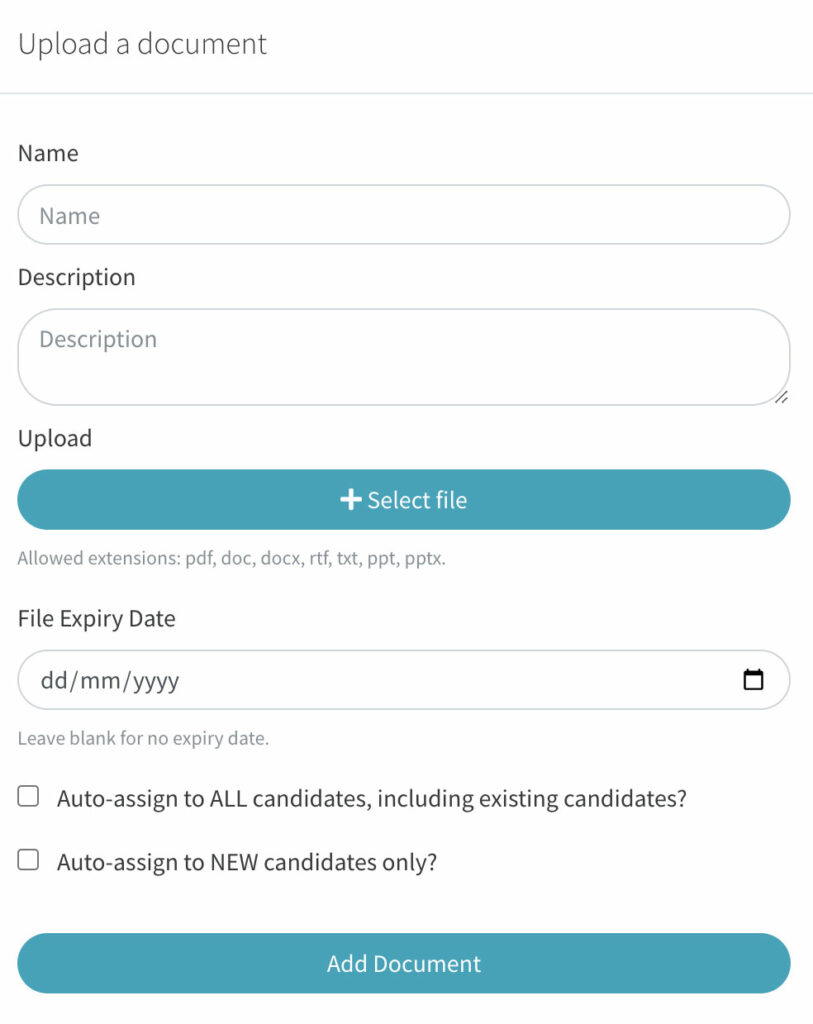
Give your document a name and description then click ‘Select File’ to upload the video from your computer. You will only be able to upload a pdf, doc, docx, rtf, txt, ppt or pptx. file, any others will first need to be converted.
There is a maximum file size of 50MB, anything above this will need to be down saved.
You then have the option to add an expiry date to the document or auto-assign it to users. Click ‘Add Document’ when done.
Your document will be uploaded and a fully compliant signature form will be added to the end for users to sign and confirm they have read and understood.
Auto Assigning Your Document (Optional)
You have two options if you’d like to auto-assign your document.
1.Auto-assign to ALL users, including existing users
If you select this option, when you upload your document, it will automatically be sent out to ALL users already within your system as well as any new users that then register.
2. Auto-assign to NEW users only
If you select this option, when you upload your document, it will only then be sent out to any new users that register.