Click on ‘Candidates’ or ‘CRM’ in the hub and then click on the button on ‘Add Candidates’ on the right hand side of the screen.
You’ll then receive this popup with three ways to add candidates
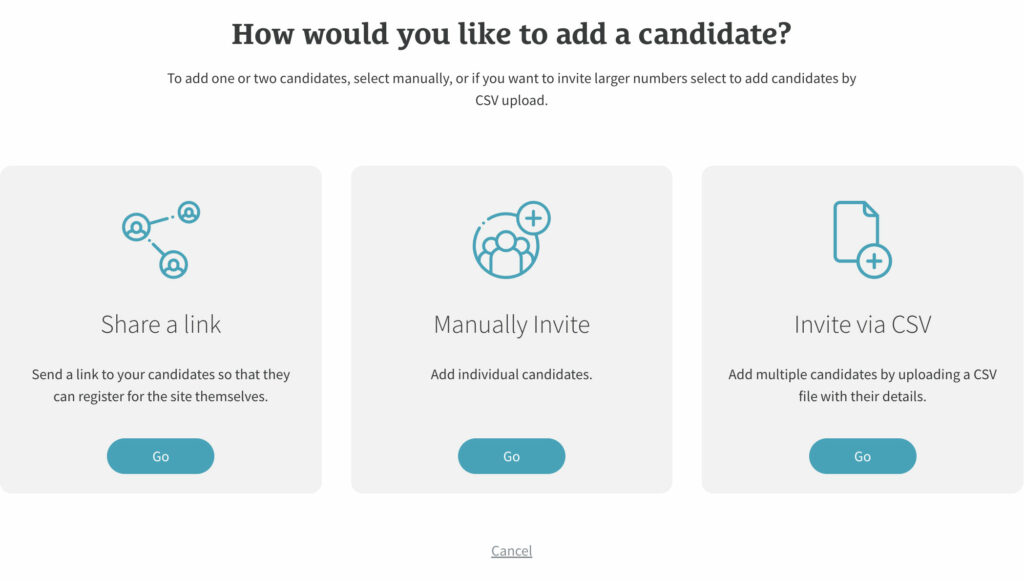
1. Share a link

- Click on the ‘Copy’ button and this will copy the link displayed in the grey field
- You can then paste this link into emails/ chats etc and the candidate will be directed to your agency login screen for them to create their logins
2. Manually Invite
If you have tags enabled, you will be first asked to tag the candidates you’d like to invite to your agency.
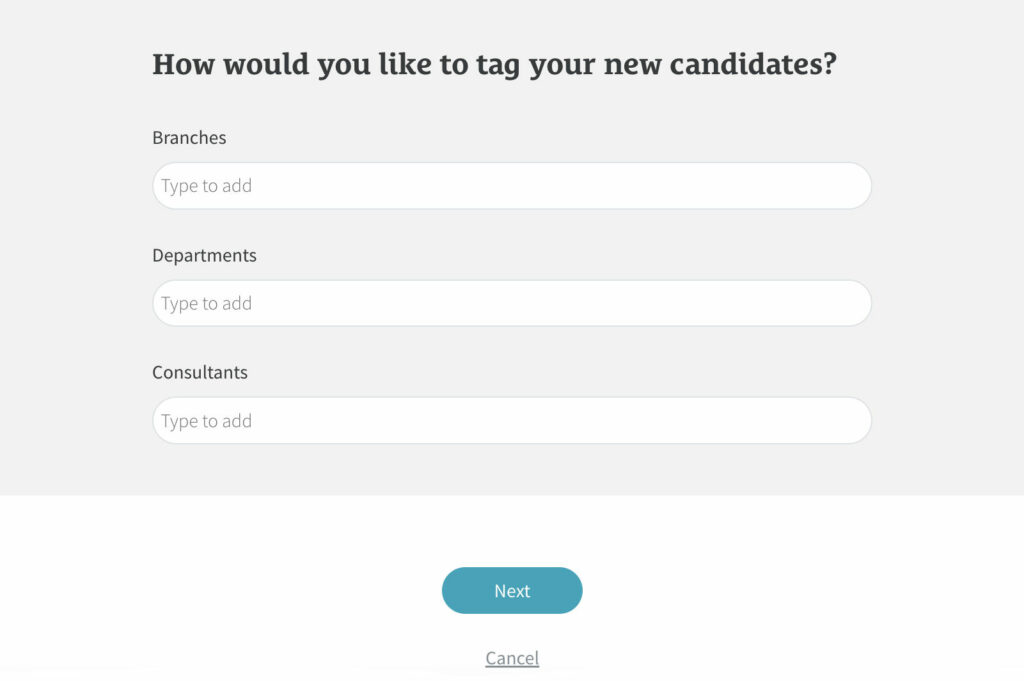
Type into the input fields to add your tags and then click ‘Next’ when finished.
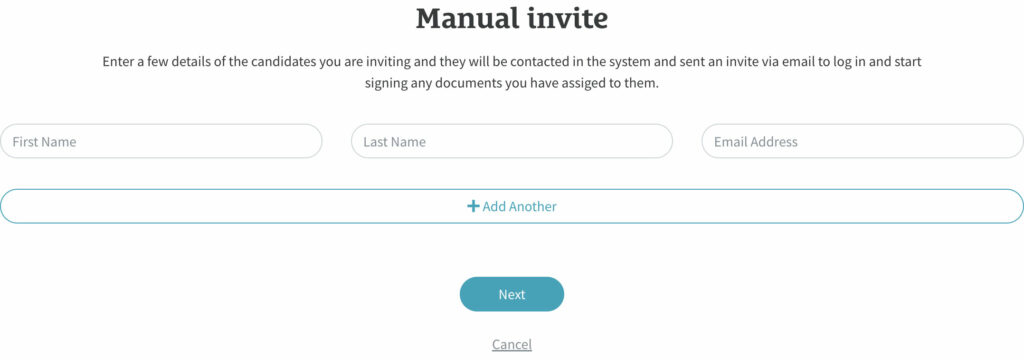
You’ll then be asked to add the first name, last name and email address of any candidates you’d like to add. Add more candidates by clicking on ‘Add Another’ then click ‘Next’ when done.
You’ll then be asked if you would like to assign any additional documents to the new candidates. Documents already set up to auto assign will also be listed here faded out in your agency colour.
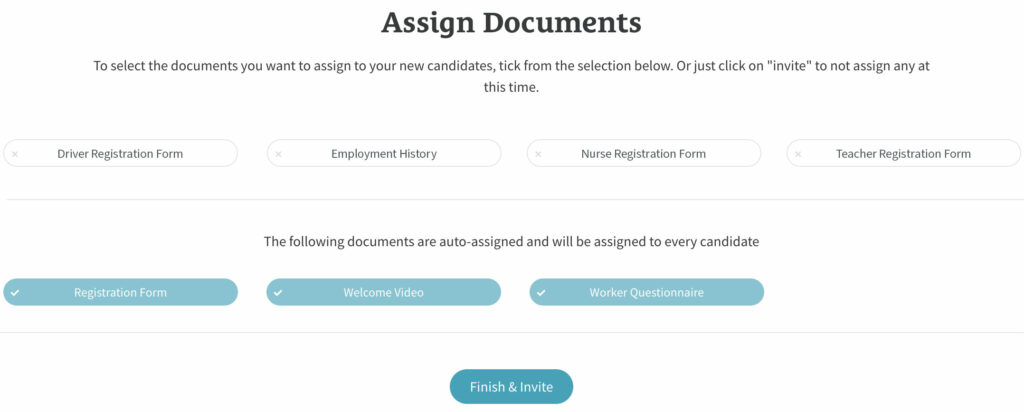
Once you’ve finished selecting and additional documents, click ‘Finish & Invite’.
The candidates will then be sent a welcome email asking them to set up a password and login.
3. Invite via CSV
If you have tags enabled, you will be first asked to tag the candidates you’d like to invite to your agency.
Type into the input fields to add your tags and then click ‘Next’ when finished.
You’ll then be asked to upload your CSV document.
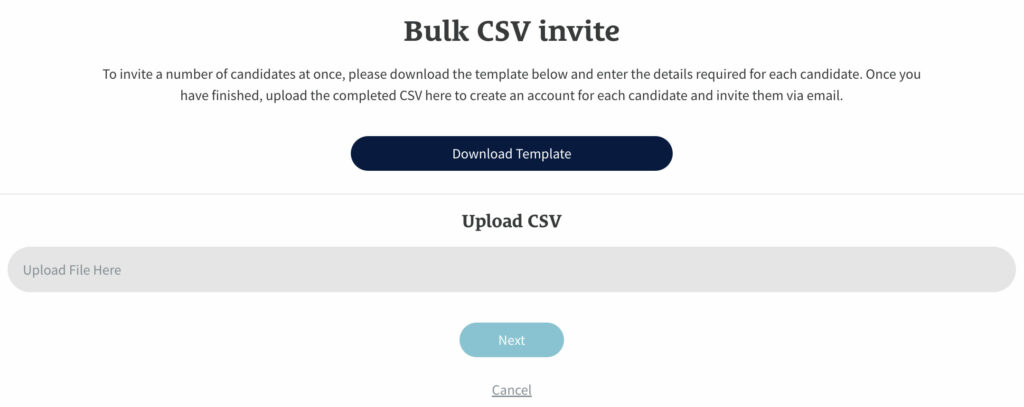
If you haven’t got a CSV document, click the ‘Download Template’ button and fill in the candidate details in the columns.
Click on the grey input box, attached your CSV document, then click ‘Next’.
You’ll then be asked if you would like to assign any additional documents to the new candidates. Documents already set up to auto assign will also be listed here faded out in your agency colour.
Once you’ve finished selecting and additional documents, click ‘Finish & Invite’.
You will then see a message saying your CSV is being processed and you will receive an email when it has finished.
The candidates will then be sent a welcome email asking them to set up a password and login.